

Description of the problem
Some of our Drupal sites have a problem with adding images or files to pages. If you use the usual "Browse server" method to add an image or file to be used on a page, you may be greeted with a broken image or broken link to a file on your page just after adding it.
The reason for this issue is not on your end--it's on ours. A configuration change to increase the security of our sites now prevents adding new images or files to some of our sites using the "Browse server" method.
We're working to find better ways to add and manage images, files, and other media assets on our Drupal sites. In the meantime, we have a workaround in place for adding images or files.
Back to top
How to add images or files when "Browse server" doesn't work
Instead of adding the image or file via the "Browse server" method, we're going to attach the image or file directly to the page you're editing.
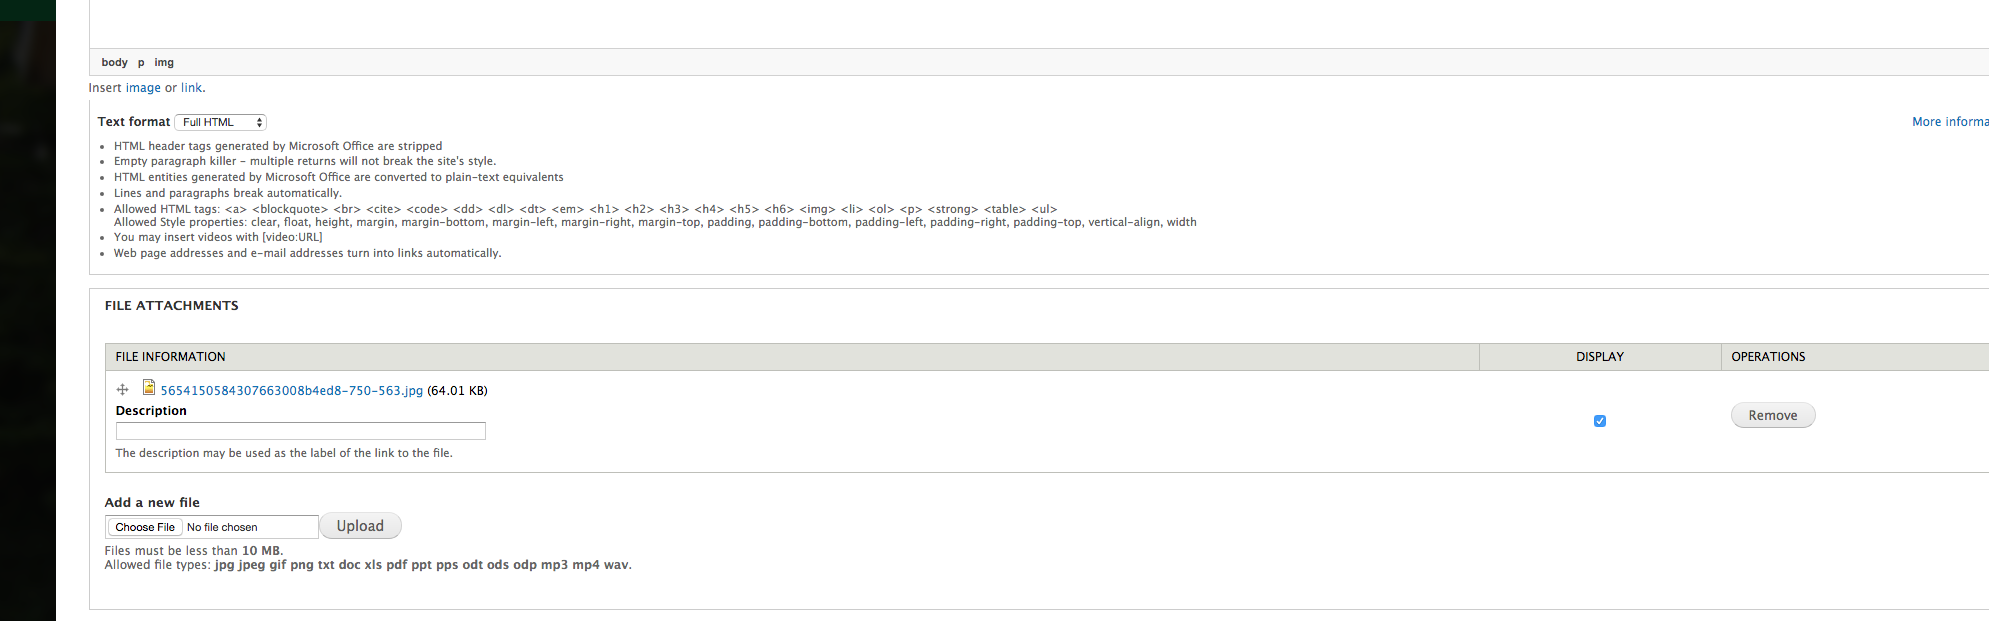
1. First, you'll want to look for the "File attachments" field while editing a page. It should be below the body field (though sometimes it may be above it, depending on what kind of content you're editing). If you don't see a "File attachments" field, email us at CAS-Web@unt.edu and let us know. We may need to make sure the "File attachments" field is enabled.
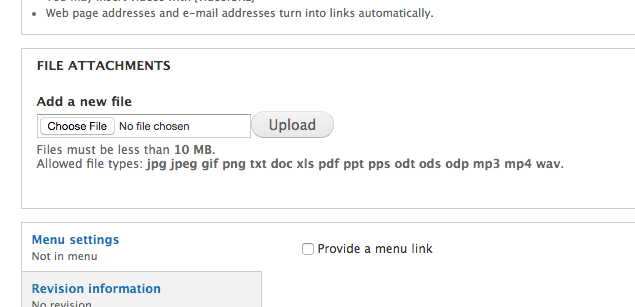
2. Next, choose the file(s) you want to add and click the "Upload" button. The file will be uploaded and listed within the "File attachments" field now.
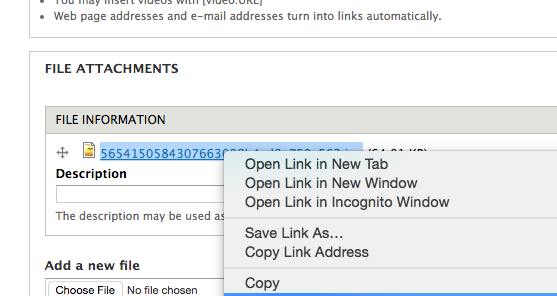
3. Next, right-click on the file and select "Copy link address." This may be worded differently depending on the browser you're using--some variations may include "Copy link URL" or "Copy image address." Doing this will copy the URL to the file you want to use to your computer's clipboard, just as if you copied some text to paste elsewhere.
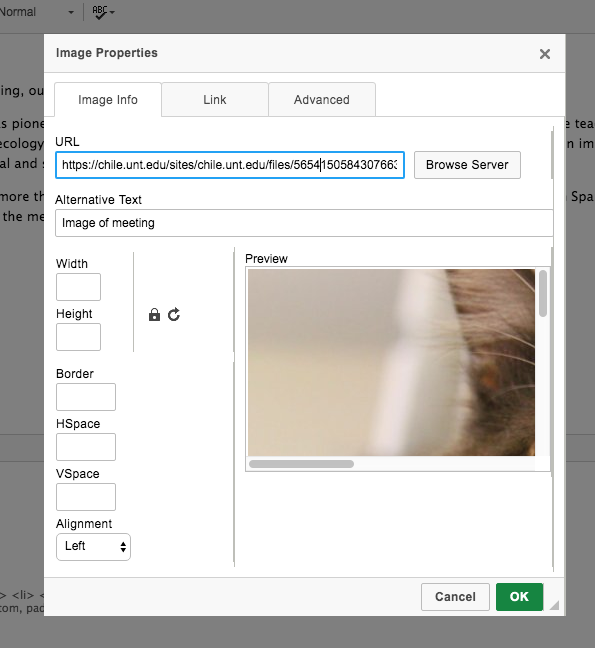
4. Finally, we're going to paste this URL into the fields we normally use when using the "Browse server" method. Right-click in the URL field and select "Paste." This example shows the image dialog window; the procedure is the same if you're adding a link to a file via the link dialog window. (Remember: to access these dialog windows, click the "Image" icon or the "Link" icon when editing the body of your page. If it's an existing image or link, right-click on the image or link while editing the page and select "Image properties" or "Edit link" respectively.)
5. Click "OK" and save your page when you're done editing it.
If you run into any issues with this workaround, please let us know at CAS-Web@unt.edu.
Back to top