

To give a user permission to send e-mails on the behalf of another user, as well as how to send e-mails on behalf of another after permission has been granted, be sure to follow this process.
NOTE: These steps have been verified on Windows 7 using Outlook 2010
- Give A User Permission to Send E-Mail on Your Behalf
- Send E-mail on Behalf of Another User
- Give A User Permission to View a Folder in Outlook
Give A User Permission to Send E-Mail on Your Behalf
Giving a user permission to send e-mail on your behalf is handled in Outlook through "Delegation." To Delegate access, open Outlook, and click on File. Once in the file menu, click on the square labeled "Account Settings".
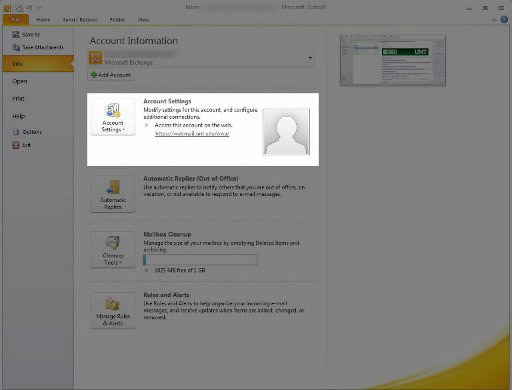
A drop down menu will appear, and the second option will be "Delegate Access".
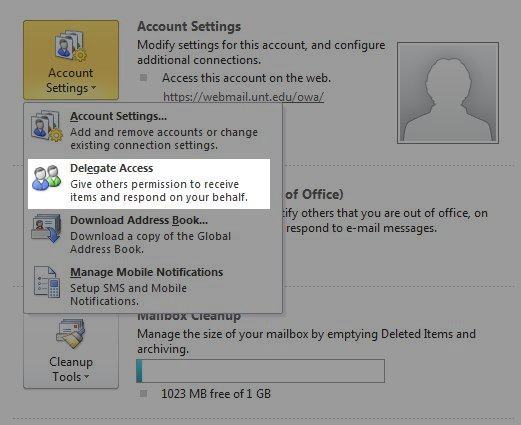
This will open a "Delegates" window. To add a user, click "Add...".
![]()
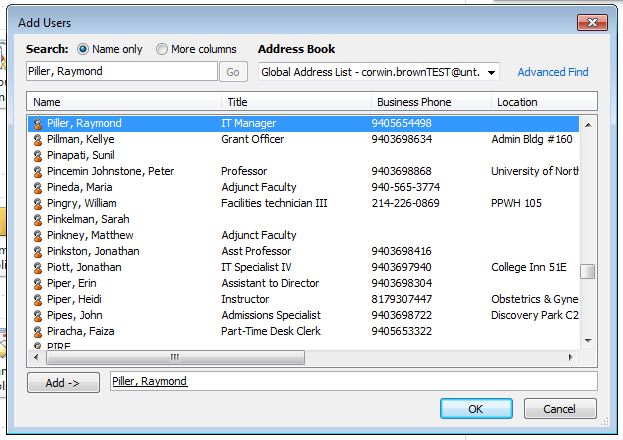
This opens up the Address Book, much like searching for a user to send mail to. Type in the name of the person who requires access, select them in the list, and click add.
This activates another menu where very specific permissions can be defined, such as allowing the user to send e-mail, create calender appointments, and view and edit the inbox. Beneth the permissions are the options to Send the Delgate a message describing their access (Checking this is recommended, although not required), or whether or not the Delegate can see any items marked private.
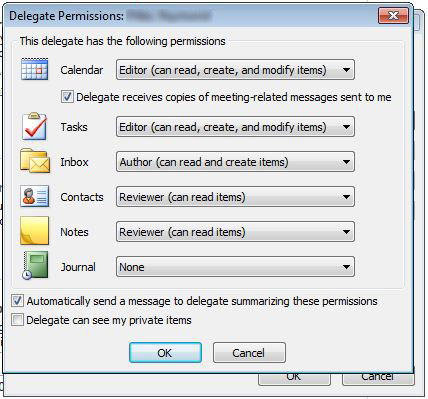
After the desired permissions are set, click the okay button on the "Permissions" window, then okay on the "Delegates" window.
Restart Outlook. Permissions should now be granted to that user!
Send an E-Mail On the Behalf of Another User
First, ensure the other user has granted the proper permissions.
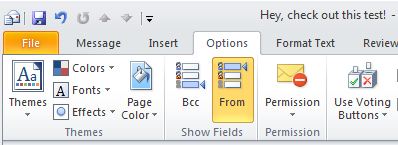
In Outlook, click New E-Mail up in the top left hand corner. This will bring up the default e-mail window. In order to send as someone else, we need to add a feild above the "To" and "CC" fields. To do so, click on "Options", and select "From".
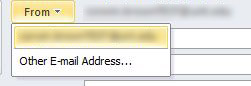
This will add a "From" field. Click on the newly added "From" field, and a drop down menu will appear showing your e-mail address as well as "Other E-mail Address...". Select "Other E-mail Address...".
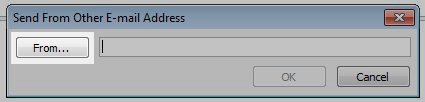
A box marked "Send From Other E-mail Address" with a "From..." button flanking the left hand side will appear. Click on "From..." and the familar Outlook Directory will pop up.
Type the name of the user you'd like to send mail on behalf of, select them in the list, and then click "OK"
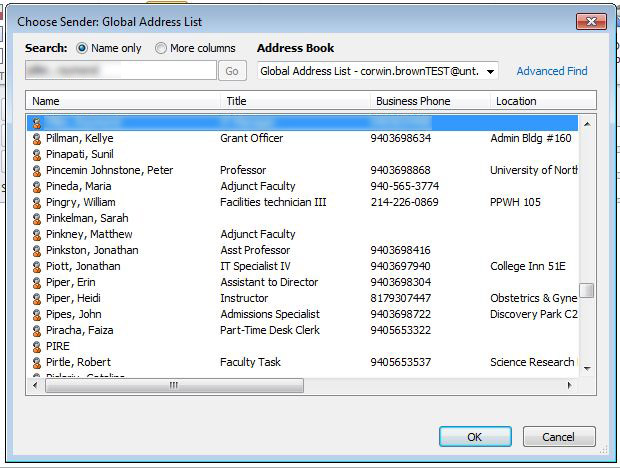
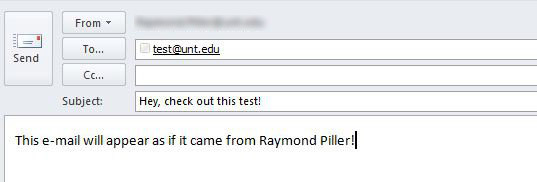
That will populate the "From..." field. Click "OK". Now write the e-mail as normal, and when it is sent, the receipient will see that mail as sent from the other User!
Give a User Permission to View a Folder in Outlook
Granting a user permission to view a folder in a mailbox is a multi-step process. First, the user must be granted permission to view the mailbox containing the folder, and then given permission to view the actual folder.
Granting a User Permission to View your Mailbox:
Note: This does not allow a user to see the contents of your mailbox.
First, right click on the mailbox containting the desired folder in the far left panel in Outlook (usually listed as firstname.lastname@unt.edu), and select "Folder Permissions". A window with a pre-selected "Permissions" tab will appear offering an array of permission options.
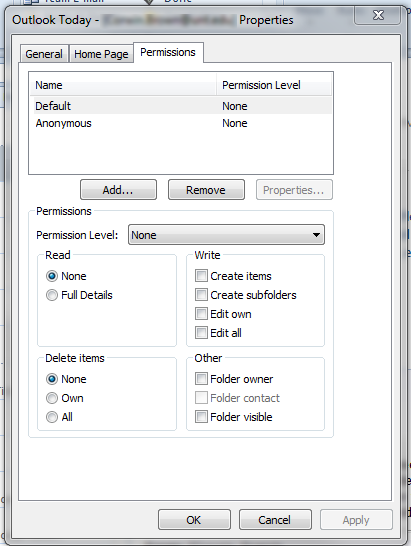
Click the "Add..." button near the top to add a new user. The University Directory will pop up. Simply type in the name of the User you wish to allow access to your mailbox, select their name, and click the "Add" button. This will add them to the permissions list.
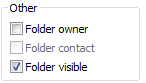
For basic permissions, ensure the added user is selected, and click "Folder Visible" under "Other" in the lower right quadrent of the window.
Click "Apply" and "Ok"
Granting a User Permission to View a Folder:
Note: The user must have permission to view the mailbox first
Right click on the desired folder, and select "Properties". A new window will appear, will a series of tabs positioned across the top. Select the tab marked "Permissions".
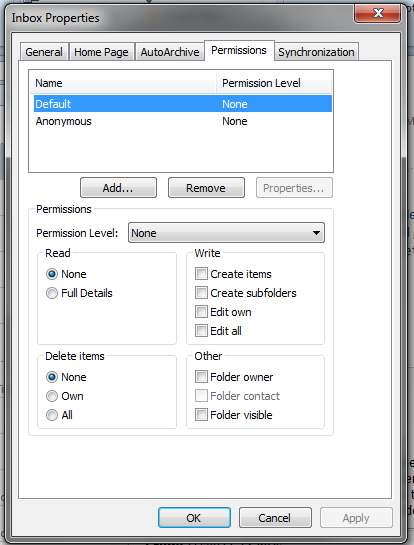
Click the "Add..." button near the top to add a new user. The University Directory will pop up. Simply type in the name of the User you wish to allow access to your mailbox, select their name, and click the "Add" button. This will add them to the permissions list.
For basic permissions, ensure the added user is selected, and click "Folder Visible" under "Other" in the lower right quadrent of the window.
Click "Apply" and "Ok"